Gmail offers more excellent features than any other free email service. It is simple, lite weight and easy to use for web users. To access all Google's products, you must have a Gmail account. Some of the popular products are YouTube, Blogger, G-Suite, and Google Docs. All these services are connected to a single Gmail account.
You can customize receiving emails by creating filters in Gmail. To organize all your emails, create labels in Gmail.
If you're a regular Gmail user, you might have come across an email forwarding feature. This feature is very useful if you want to receive emails to your new email address from the existing address. You can forward Gmail to another person by enabling this feature.
Must-See: How To Create College Student Email Signature
The auto-forward email feature allows you to forward all of your emails or specific emails to your other address. By forwarding emails in Gmail, you'll have two copies of emails on both accounts.
After setting up email forwarding, you can change the forwarding address at any time.
Requirements
- Two active Gmail accounts.
- Desktop PC to set up email forwarding in Gmail.
How To Enable Gmail Auto-Forward
You can set up email forwarding only on the desktop version. The Gmail app doesn't have this feature. While setting up email forwarding, you've to verify the second email address to the active Gmail Auto-forward feature.
Let's begin the guide.
Let's begin the guide.
- Log in to your Gmail account.
- Go to Settings by clicking the Gear icon.
- Click Forwarding and POP/IMAP.
- Click Add a forwarding address.
In the next pop-up box,
- Enter the secondary email address to receive forwarding emails.
- Click the Next button.
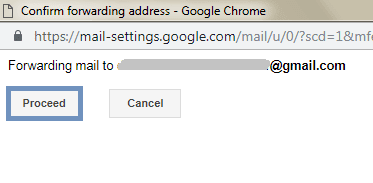
A new window will open asking you to proceed with the process.
- Click the Proceed button to send a verification email to your secondary email address.
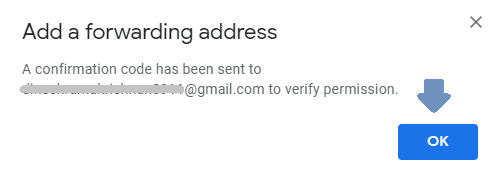
You'll see a notification stating, "A confirmation code has been sent to the entered email address to verify permission".
- Click the OK button.
- Log in to your second Gmail account.
- Open the verification email from Gmail Team.
- Copy the confirmation code.
- Click the verification link to automatically forward emails from the primary to the secondary email address.
- Click Confirm button on the new window.
You'll see the below confirmation message in the same window.
- Then, go back to the primary Gmail account settings.
- Enter the verification code.
- Click the Verify button.
- Click the 2nd radio button stating, "Forward a copy of incoming mail to".
Next to this, you can see a box with several options to choose from. Tell Gmail what it has to do apart from forwarding when a new email is received in the Primary account. You can choose any one command out of the following four options given below.
1. Keep Gmail's copy in the inbox - It instructs Gmail to have a copy of the received email as an unread message.
2. Mark Gmail's copy as read - It tells Gmail to have a copy of the forwarded email but mark them as read.
3. Archive Gmail's copy - Gmail will archive the email in the primary account. You can later find the email in the All Mail folder.
4. Delete Gmail's copy - It instructs Gmail to move the received email to the Trash folder after forwarding. The trashed email will be deleted permanently after 30 days. Choosing this option isn't a good idea. In case you lose the second account, you'll still have the backup in the first account.
- At last, Scroll down and click the Save Changes button.
You're done. All the emails will be forwarded to your secondary email address.
How To Auto-Forward Specific Emails From Gmail
Sometimes you'll be annoyed if you receive all emails from one to another account. You can instruct Gmail to forward certain emails by creating a filter.
After setting up an email forward,
- Click Create filter link as shown below.
- You can tell Gmail which emails should be forwarded to the second account by putting necessary inputs in this filter option.
Check out this guide to learn how to create a filter easily.
- Save the changes once you're done.
How To Stop Email Forwarding in Gmail
If you don't want to receive the forwarded emails from your first account, you must deactivate email forwarding.
Let's see how to do that.
- Scroll down and click on the Save Changes button.
Now, the email forwarding has been deactivated.
You can enable this feature any time by clicking the 2nd radio button and saving it.
To Delete The Secondary Email Address From Email Forwarding,
- Click on the Drop-down button as shown below.
- Click Remove email address (in use).
- Then, click OK on the next pop-up box to confirm active forward address removal.
The email address will be removed from the auto-forward service. You've to follow all the steps from the beginning to set up email forwarding.
Conclusion
Test the auto-forward feature before you're going busy. It will help you to ensure that no emails will be missed in the end.


